Cách thiết lập ban đầu Windows Server 2019
- Thứ tư - 04/08/2021 21:19
- In ra
- Đóng cửa sổ này
Cách thiết lập ban đầu Windows Server 2019
Thêm người dùng cục bộ
1. Chạy PowerShell với quyền admin và cấu hình như sau:
Windows PowerShell
Copyright (C) Microsoft Corporation. All rights reserved.

# for example, add [Serverworld] user
# [P@ssw0rd01] ⇒ the password you set (replace it you like)
# [PasswordNeverExpires] ⇒ set password never expire(if set default expiration, do not specify this option)
PS C:\Users\Administrator> New-LocalUser -Name "Serverworld" `
-FullName "Server World" `
-Description "Administrator of this Computer" `
-Password (ConvertTo-SecureString -AsPlainText "P@ssw0rd01" -Force) `
-PasswordNeverExpires `
-AccountNeverExpires

Name        Enabled Description
----        ------- -----------
Serverworld True    Administrator of this Computer

# add [Serverworld] user to [Administrators] group
PS C:\Users\Administrator> Add-LocalGroupMember -Group "Administrators" -Member "Serverworld"

# verify
PS C:\Users\Administrator> Get-LocalUser -Name Serverworld

Name        Enabled Description
----        ------- -----------
Serverworld True    Administrator of this Computer

PS C:\Users\Administrator> Get-LocalGroupMember -Group "Administrators"

ObjectClass Name               PrincipalSource
----------- ----               ---------------
User        RX-7\Administrator Local
User        RX-7\Serverworld   Local

# if remove an user, do like follows
PS C:\Users\Administrator> Remove-LocalUser -Name "Serverworld"
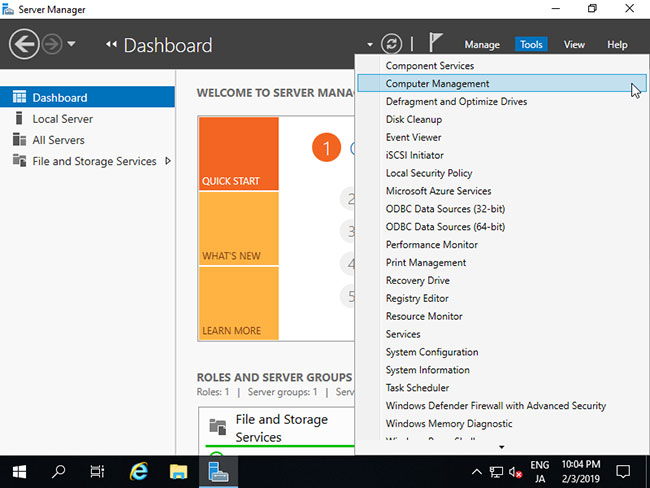
2. Chạy Server Manager và mở Tools > Computer Management.
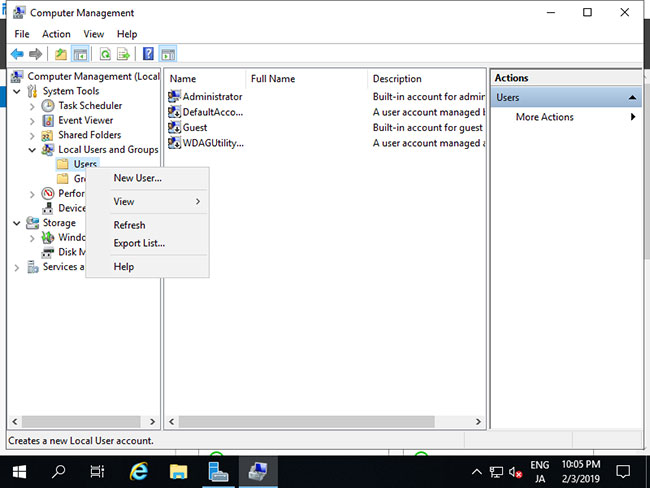
3. Nhấp chuột phải vào Users bên dưới Local Users and Groups ở bên trái và chọn New User.
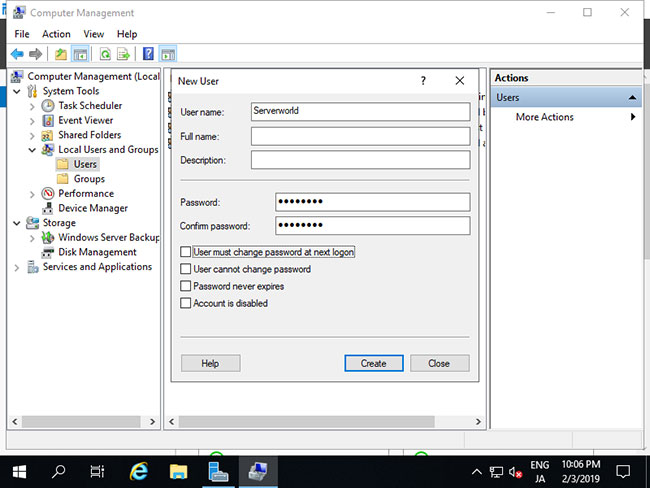
4. Nhập Username và Password cho người dùng mới, rồi nhấp vào nút Create. Các mục khác là tùy chọn để thiết lập.
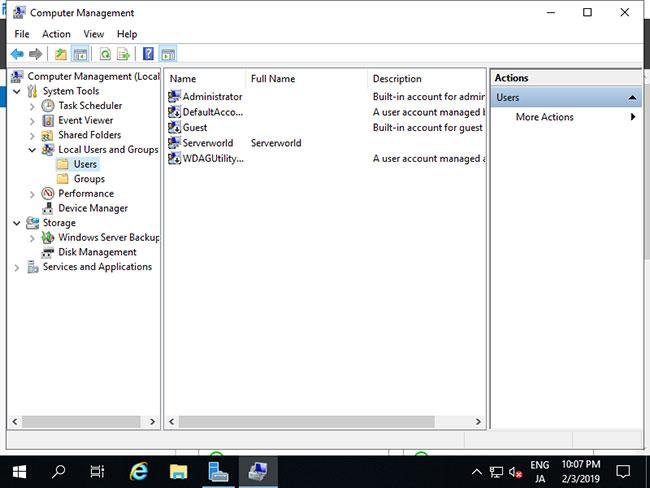
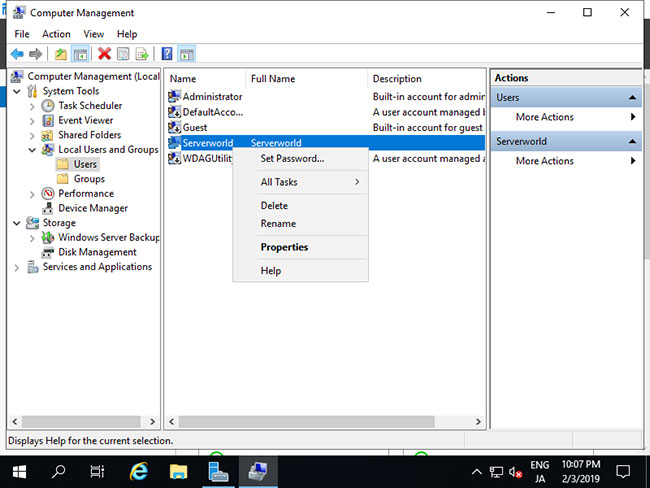
5. Sau khi tạo, người dùng mới được hiển thị trên danh sách như sau.
6. Nếu bạn muốn đặt quyền admin cho người dùng mới, hãy nhấp chuột phải vào người dùng và mở Properties.
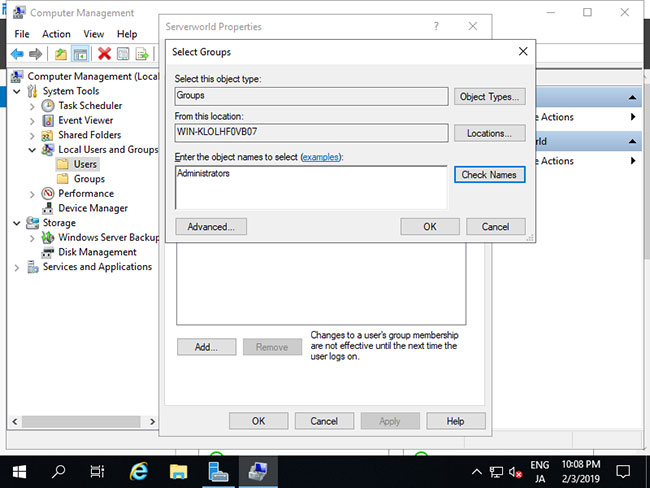
7. Di chuyển đến tab Member of và nhấp vào nút Add.

8. Chỉ định nhóm Administrators như sau.
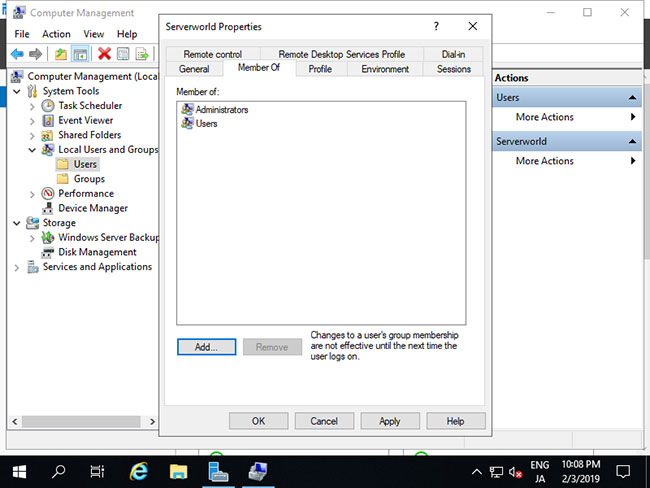
9. Đảm bảo rằng nhóm Administrators được thêm vào danh sách và nhấp vào nút OK để hoàn tất cài đặt.
Thay đổi username admin
Nếu muốn thay đổi tên tài khoản admin vì một số lý do như bảo mật, bạn có thể thay đổi như sau.
1. Chạy PowerShell với quyền admin và cấu hình như sau:
Windows PowerShell
Copyright (C) Microsoft Corporation. All rights reserved.

# for example, change the name [Administrator] to [ServerworldAdmin]
PS C:\Users\Administrator> Rename-LocalUser -Name "Administrator" -NewName "ServerworldAdmin"

PS C:\Users\Administrator> Get-LocalUser

# changed
Name               Enabled Description
----               ------- -----------
DefaultAccount     False   A user account managed by the system.
Guest              False   Built-in account for guest access to the computer/domain
Serverworld        True    Administrator of this Computer
ServerworldAdmin   True    Built-in account for administering the computer/domain
sshd               True
WDAGUtilityAccount False   A user account managed and used by the system for Windows Defender Application Guard scen...
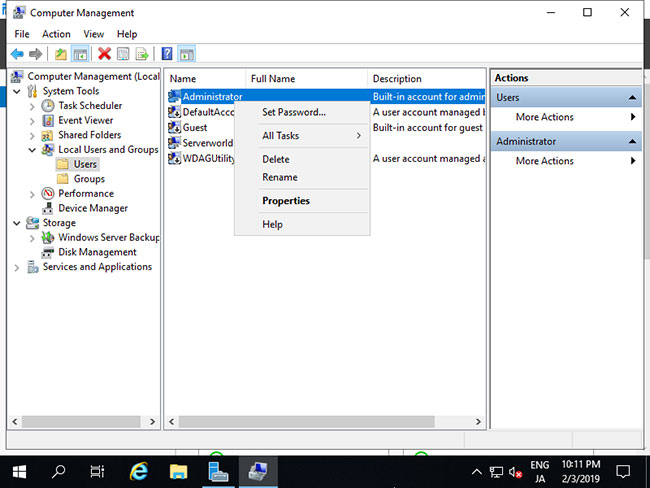
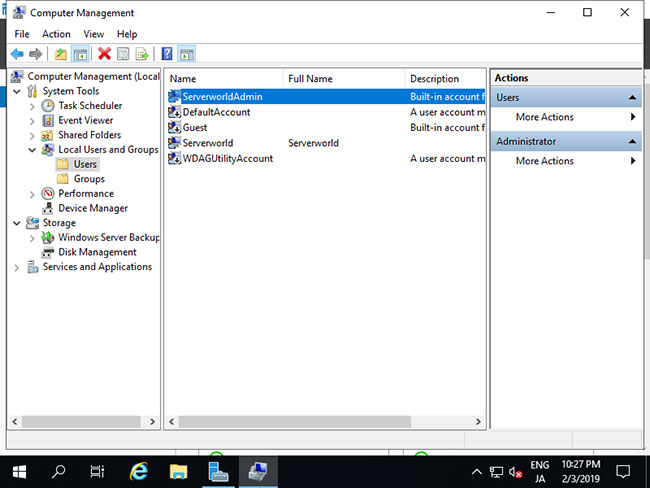
2. Chạy Server Manager và mở Tools > Computer Management.
3. Mở Local Users and Groups > Users ở bên trái và nhấp chuột phải vào Administrator, rồi chọn Rename ở bên phải. Sau đó, thay đổi bất kỳ tên nào bạn thích.
4. Tên Admin vừa được thay đổi.
Thay đổi tên máy tính
Tên máy tính được gán tự động theo mặc định, vì vậy hãy thay đổi nó.
1. Chạy PowerShell với quyền admin và cấu hình như sau:
Windows PowerShell
Copyright (C) Microsoft Corporation. All rights reserved.

# for example, change Computer Name to [RX-7]
PS C:\Users\Administrator> Rename-Computer -NewName RX-7 -Force -PassThru

HasSucceeded OldComputerName           NewComputerName
------------ ---------------           ---------------
True         RX-7                      RX-9
WARNING: The changes will take effect after you restart the computer RX-7.

# for example, change Primary DNS Suffix to [srv.world]
PS C:\Users\Administrator> Set-ItemProperty "HKLM:\SYSTEM\CurrentControlSet\Services\Tcpip\Parameters\" –Name "NV Domain" –Value "srv.world" -PassThru

NV Domain    : srv.world
PSPath       : Microsoft.PowerShell.Core\Registry::HKEY_LOCAL_MACHINE\SYSTEM\CurrentControlSet\Services\Tcpip\Parameters\
PSParentPath : Microsoft.PowerShell.Core\Registry::HKEY_LOCAL_MACHINE\SYSTEM\CurrentControlSet\Services\Tcpip
PSChildName  : Parameters
PSDrive      : HKLM
PSProvider   : Microsoft.PowerShell.Core\Registry

# restart Computer to apply changes
PS C:\Users\Administrator> Restart-Computer -Force

# verify
PS C:\Users\Administrator> (ipconfig /all)[0..9]

Windows IP Configuration

   Host Name . . . . . . . . . . . . : RX-7
   Primary Dns Suffix  . . . . . . . : srv.world
   Node Type . . . . . . . . . . . . : Hybrid
   IP Routing Enabled. . . . . . . . : No
   WINS Proxy Enabled. . . . . . . . : No
   DNS Suffix Search List. . . . . . : srv.world
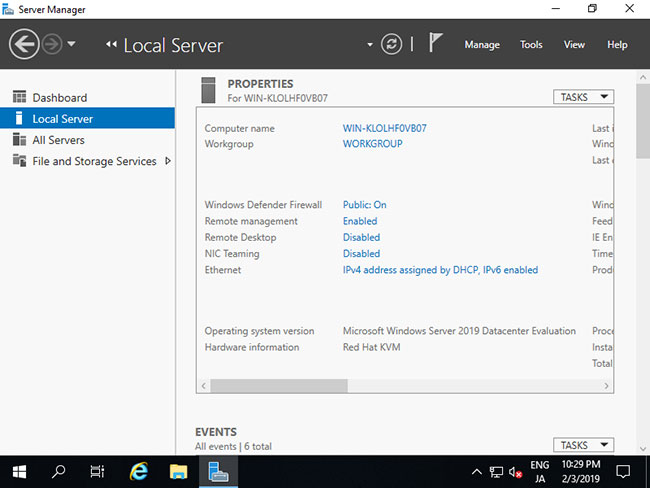
2. Chạy Server Manager và chọn Local Server ở bên trái, rồi kích vào phần Computer Name ở bên phải.
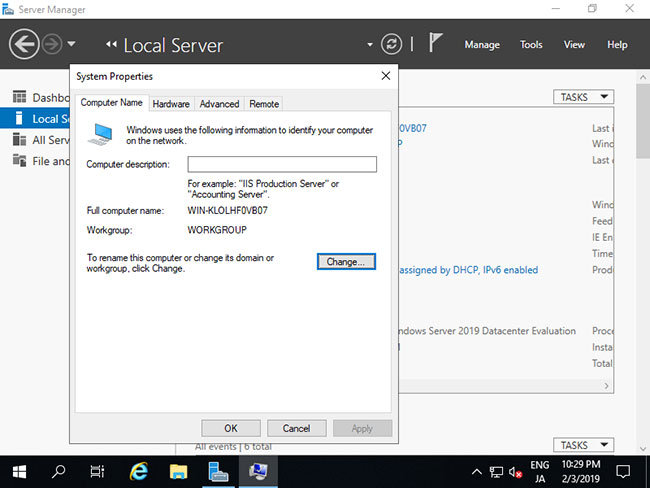
3. Di chuyển đến tab Computer Name và kích vào nút Change.
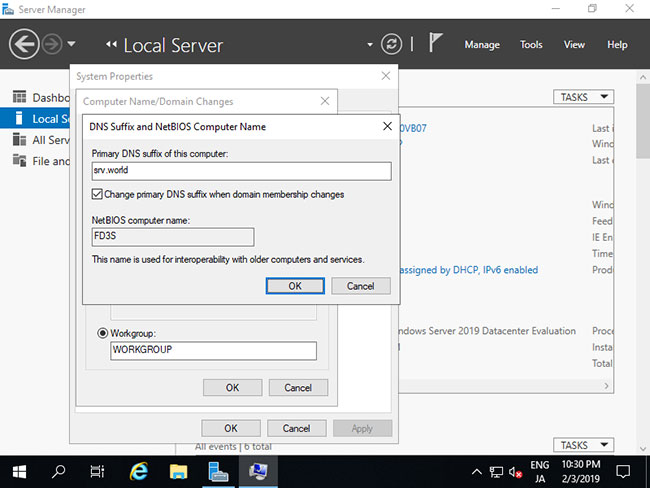
4. Nhập bất kỳ tên máy tính nào bạn thích vào trường Computer Name và nhấp vào nút More...
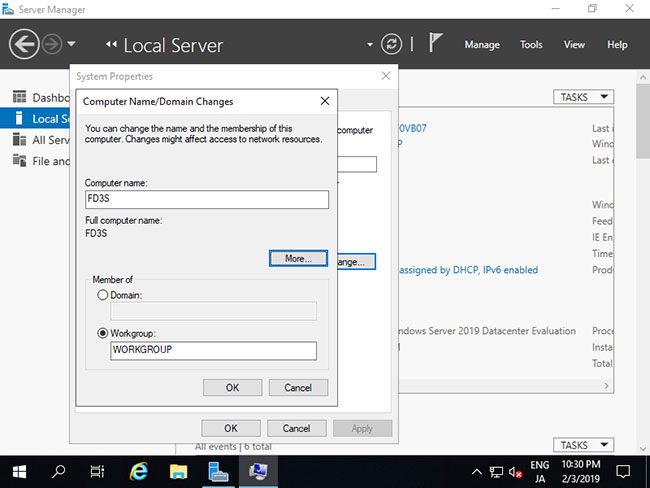
5. Nhập tên domain mà máy tính này đang thuộc về.
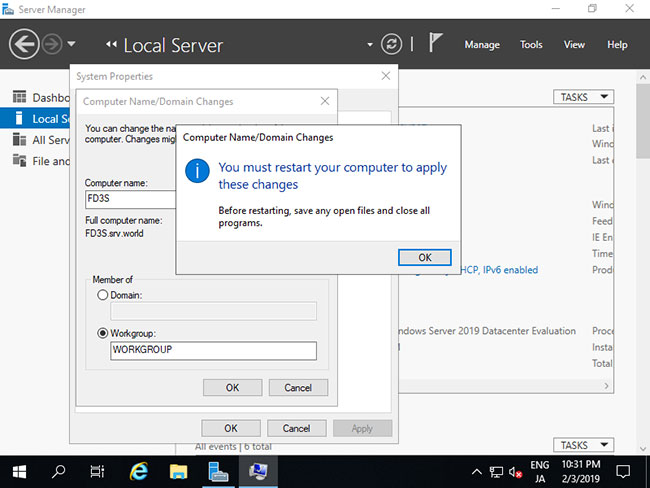
6. Việc khởi động lại máy tính là bắt buộc để áp dụng các thay đổi.
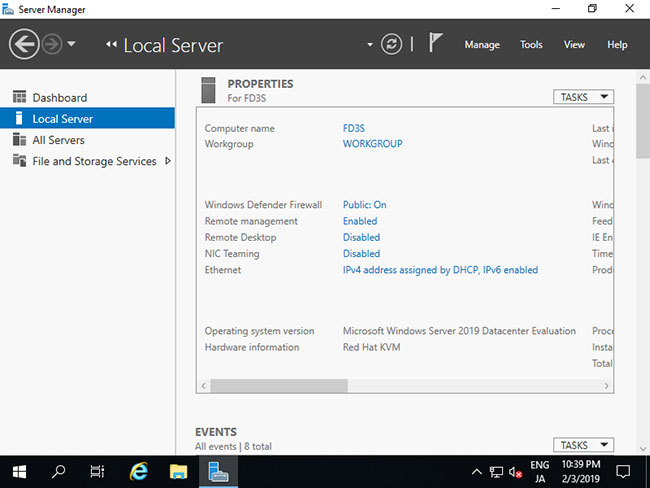
7. Tên máy tính được thay đổi bình thường.

Đặt địa chỉ IP tĩnh
Địa chỉ IP được DHCP gán theo mặc định, vì vậy hãy đặt địa chỉ IP tĩnh cho việc sử dụng Server. Ví dụ này cho thấy cách đặt địa chỉ IPv4. Trên cấu hình CUI, hãy thiết lập như sau.
1. Chạy PowerShell với quyền admin và cấu hình như sau:
Windows PowerShell
Copyright (C) Microsoft Corporation. All rights reserved.

# make sure network interfaces
PS C:\Users\Administrator> Get-NetIPInterface -AddressFamily IPv4

ifIndex InterfaceAlias                  AddressFamily NlMtu(Bytes) InterfaceMetric Dhcp     ConnectionState PolicyStore
------- --------------                  ------------- ------------ --------------- ----     --------------- -----------
6       Ethernet                        IPv4                  1500              15 Enabled  Connected       ActiveStore
1       Loopback Pseudo-Interface 1     IPv4            4294967295              75 Disabled Connected       ActiveStore

# set DHCP off (replace InterfaceIndex number to your own environment (ifIndex above))
PS C:\Users\Administrator> Set-NetIPInterface -InterfaceIndex 6 -Dhcp Disabled

# for example, set IP address [10.0.0.101/24], gateway [10.0.0.1]
PS C:\Users\Administrator> New-NetIPAddress -InterfaceIndex 6 -AddressFamily IPv4 -IPAddress "10.0.0.101" -PrefixLength 24 -DefaultGateway "10.0.0.1"

IPAddress         : 10.0.0.101
InterfaceIndex    : 6
InterfaceAlias    : Ethernet
AddressFamily     : IPv4
Type              : Unicast
PrefixLength      : 24
PrefixOrigin      : Manual
SuffixOrigin      : Manual
AddressState      : Tentative
ValidLifetime     : Infinite ([TimeSpan]::MaxValue)
PreferredLifetime : Infinite ([TimeSpan]::MaxValue)
SkipAsSource      : False
PolicyStore       : ActiveStore

# for example, set DNS [10.0.0.10]
PS C:\Users\Administrator> Set-DnsClientServerAddress -InterfaceIndex 6 -ServerAddresses "10.0.0.10" -PassThru

InterfaceAlias               Interface Address ServerAddresses
                             Index     Family
--------------               --------- ------- ---------------
Ethernet                             6 IPv4    {10.0.0.10}
Ethernet                             6 IPv6    {}

# confirm settings
PS C:\Users\Administrator> ipconfig /all

Windows IP Configuration

   Host Name . . . . . . . . . . . . : RX-7
   Primary Dns Suffix  . . . . . . . : srv.world
   Node Type . . . . . . . . . . . . : Hybrid
   IP Routing Enabled. . . . . . . . : No
   WINS Proxy Enabled. . . . . . . . : No
   DNS Suffix Search List. . . . . . : srv.world

Ethernet adapter Ethernet:

   Connection-specific DNS Suffix  . :
   Description . . . . . . . . . . . : Red Hat VirtIO Ethernet Adapter
   Physical Address. . . . . . . . . : 52-54-00-07-22-41
   DHCP Enabled. . . . . . . . . . . : No
   Autoconfiguration Enabled . . . . : Yes
   Link-local IPv6 Address . . . . . : fe80::b547:c48c:6151:2fcf%6(Preferred)
   IPv4 Address. . . . . . . . . . . : 10.0.0.101(Preferred)
   Subnet Mask . . . . . . . . . . . : 255.255.255.0
   Default Gateway . . . . . . . . . : 10.0.0.1
   DNS Servers . . . . . . . . . . . : 10.0.0.10
   NetBIOS over Tcpip. . . . . . . . : Enabled
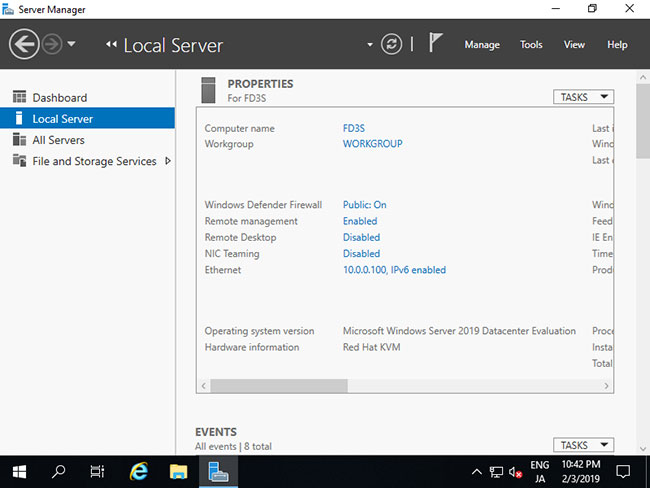
2. Chạy Server Manager và chọn Local Server trên bảng điều khiển bên trái, rồi nhấp vào phần Ethernet trên bảng điều khiển bên phải.
3. Nhấp chuột phải vào biểu tượng Ethernet và mở Properties.
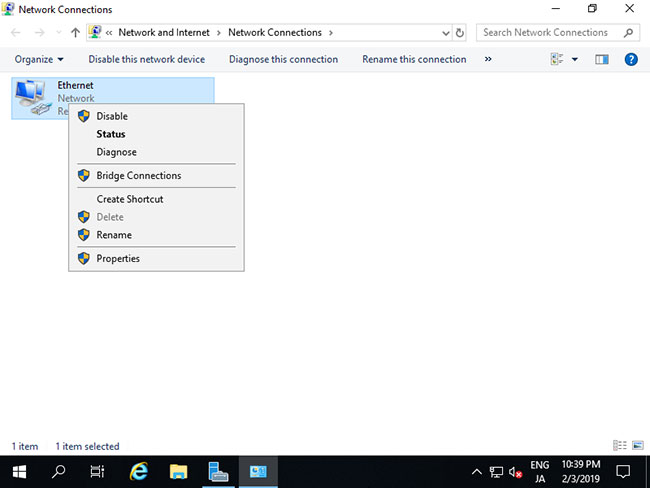
4. Chọn Internet Protocol Version 4 và nhấp vào nút Properties.

5. Đặt địa chỉ IP tĩnh, gateway và các địa chỉ khác cho mạng cục bộ của bạn.
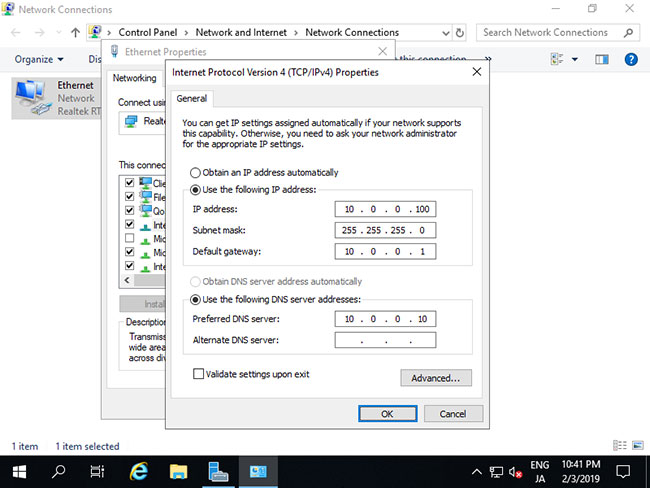
6. Sau khi đặt địa chỉ IP tĩnh, các thay đổi sẽ được kích hoạt trên Server Manager.
SỬA CHỮA MÁY TÍNH TẠI NHÀ Ở HÓC MÔN
Với dịch vụ sửa máy tính tại nhà ở Hóc Môn và dịch vụ sửa máy tính tại nhà ở TP.HCM, Công ty Phát Thành Đạt sẽ luôn đem lại sự hài lòng nhất tới cho bạn, dịch vụ sửa chữa máy tính tại nhà luôn đồng hành cùng bạn từ (8h tới 17h trong ngày). Bảo trì định kỳ mỗi tháng (vệ sinh máy tính, update virus, tối ưu hệ thống...). Liên hệ Hotline 0908.554.558 - Info@phatthanhdat.com
Chúc bạn thực hiện thành công!
Xem thêm
1. Tải và cài đặt Windows Server 2019
2. Cách cài đặt VPN trên Windows Server 2019