Bản phát hành Windows Server 2019 mới của Microsoft đi kèm với phiên bản IIS 10. Hướng dẫn này sẽ cho biết cách cài đặt cài đặt và sử dụng IIS trên Windows Server 2019.
1. Chạy Powershell với quyền admin và cài đặt IIS.
Windows PowerShell
Copyright (C) Microsoft Corporation. All rights reserved.

# install IIS with admin tools
PS C:\Users\Administrator> Install-WindowsFeature Web-Server -IncludeManagementTools

Success Restart Needed Exit Code      Feature Result
------- -------------- ---------      --------------
True    No             Success        {Common HTTP Features, Default Document, D...

# verify running to access to default web site
PS C:\Users\Administrator> Invoke-WebRequest http://localhost

StatusCode        : 200
StatusDescription : OK
Content           : <!DOCTYPE html PUBLIC "-//W3C//DTD XHTML 1.0 Strict//EN"
                    "http://www.w3.org/TR/xhtml1/DTD/xhtml1-strict.dtd">
                    <html xmlns="http://www.w3.org/1999/xhtml">
                    <head>
                    <meta http-equiv="Content-Type" cont...
RawContent        : HTTP/1.1 200 OK
                    Accept-Ranges: bytes
                    Content-Length: 703
                    Content-Type: text/html
                    Date: Wed, 28 Aug 2019 02:02:51 GMT
                    ETag: "a40a0f9435dd51:0"
                    Last-Modified: Wed, 28 Aug 2019 01:57:40 GMT
                    Server...
Forms             : {}
Headers           : {[Accept-Ranges, bytes], [Content-Length, 703], [Content-Type, text/html], [Date, Wed, 28 Aug 2019
                    02:02:51 GMT]...}
                    href="http://go.microsoft.com/fwlink/?linkid=66138&clcid=0x409"><IMG alt=IIS
                    src="iisstart.png" width=960 height=600></A>; outerText=; tagName=A;
                    href=http://go.microsoft.com/fwlink/?linkid=66138&clcid=0x409}}
ParsedHtml        : System.__ComObject
RawContentLength  : 703
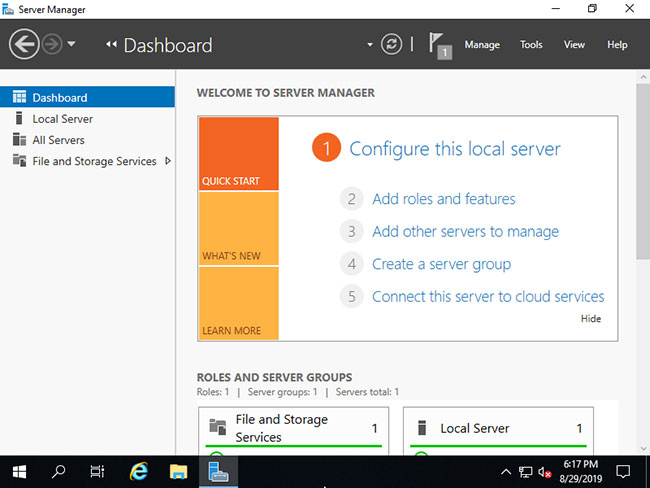
2. Chạy Server Manager và nhấp vào Add roles and features.

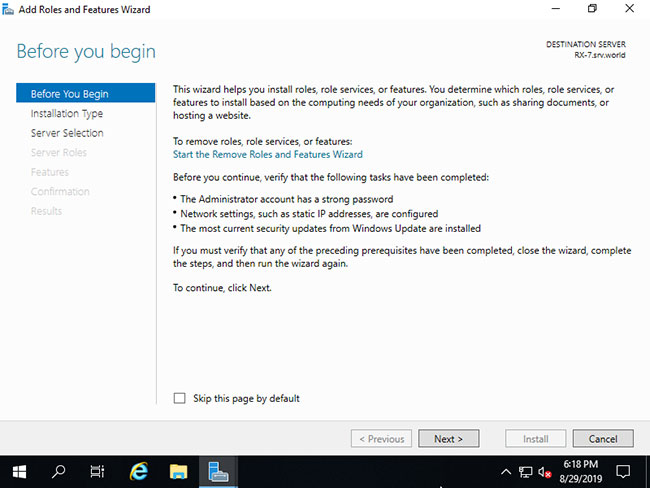
3. Nhấp vào nút Next.
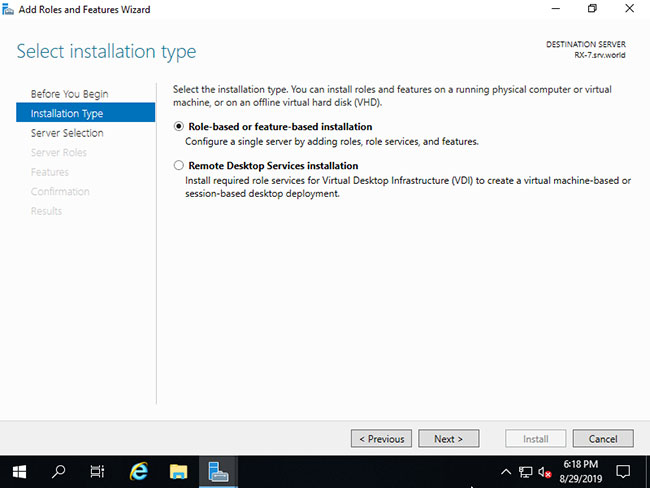
4. Chọn Role-based or feature-based installation.
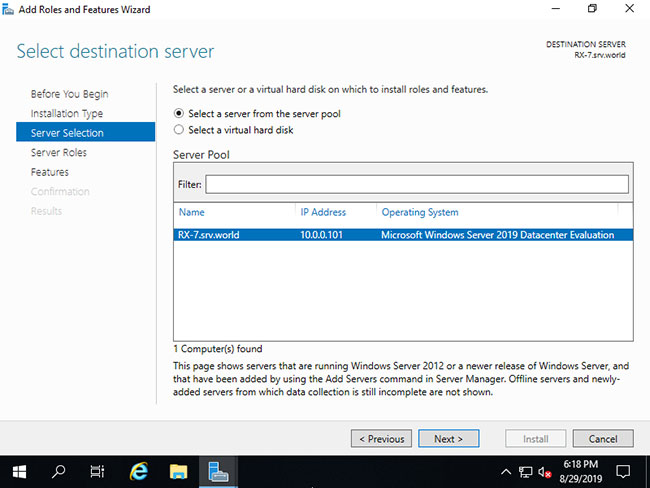
5. Chọn host bạn muốn thêm các service.
6. Tích vào hộp Web Server (IIS).
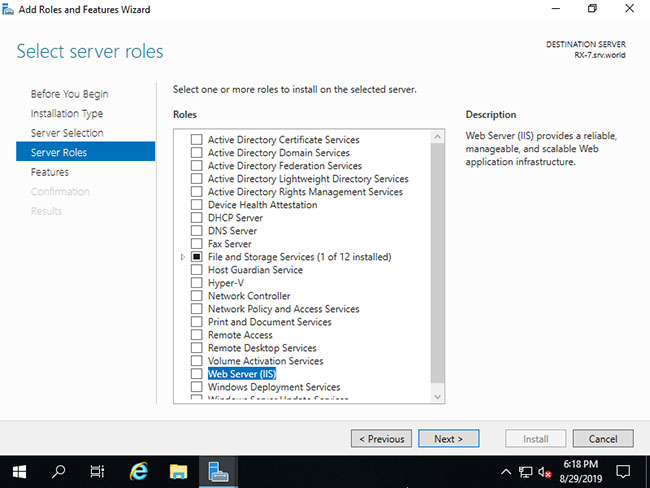
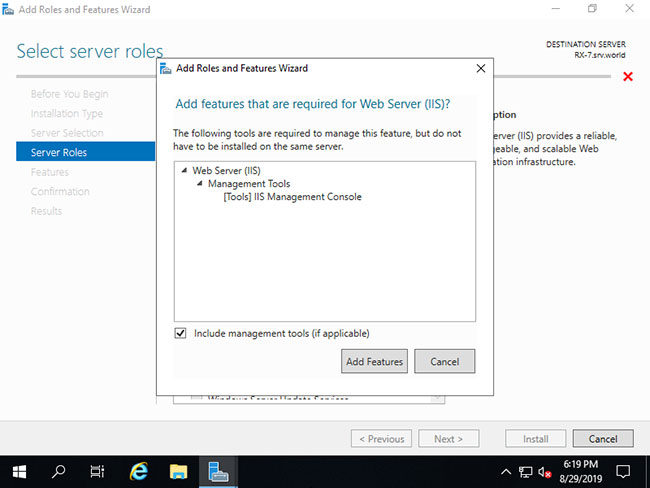
7. Các tính năng bổ sung được yêu cầu để thêm IIS Server. Nhấp vào nút Add Features > Next.
8. Nhấp vào nút Next.
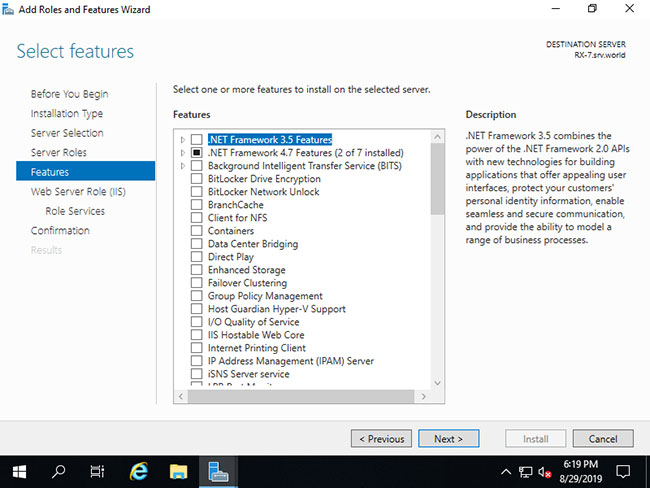
9. Nhấp vào nút Next.
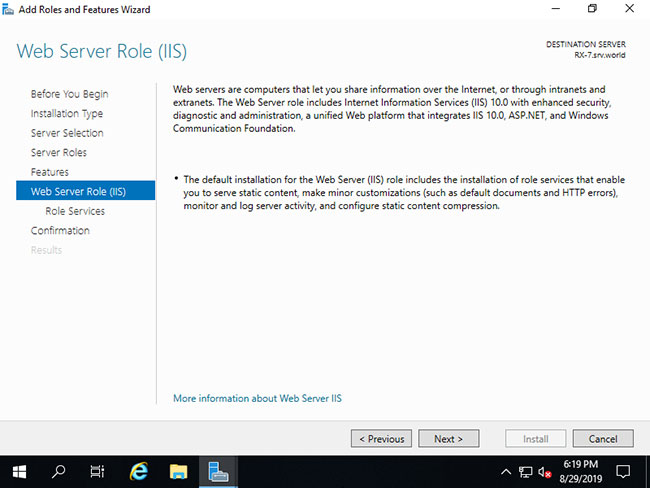
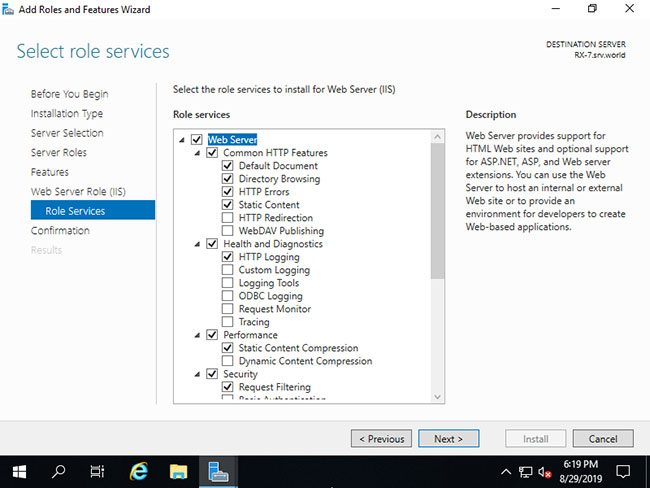
10. Đây là phần chọn các tính năng của Web Server. Hãy chọn những tính năng mà bạn muốn thêm. Trong ví dụ này, các tùy chọn mặc định được giữ nguyên. Tất nhiên, bạn có thể thêm các tính năng này sau khi cài đặt IIS.
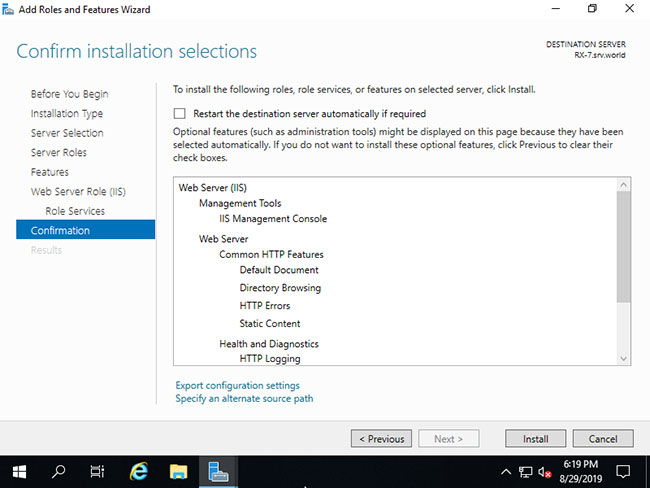
11. Nhấp vào nút Install.
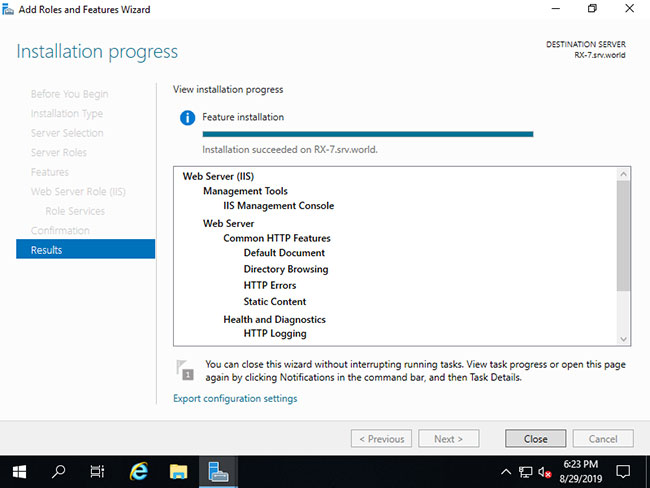
12. Sau khi kết thúc cài đặt, nhấp vào nút Close.
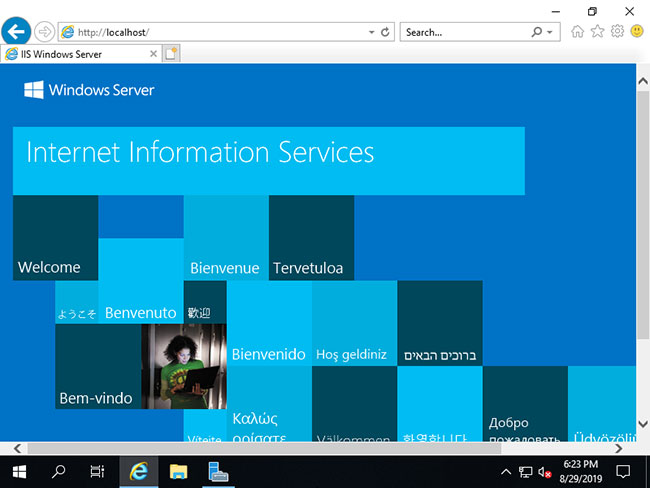
13. Chạy trình duyệt web và truy cập vào localhost, sau đó bạn có thể xác minh IIS có đang chạy bình thường không.
1. Chạy Powershell với quyền admin và cấu hình như sau:
Windows PowerShell
Copyright (C) Microsoft Corporation. All rights reserved.

# show Sites list : [Default Web Site] is only set
PS C:\Users\Administrator> Get-Website

Name             ID   State      Physical Path                  Bindings
----             --   -----      -------------                  --------
Default Web Site 1    Started    %SystemDrive%\inetpub\wwwroot  http *:80:

# [Physical Path] is the Document Root
PS C:\Users\Administrator> Get-ChildItem C:\inetpub\wwwroot

    Directory: C:\inetpub\wwwroot

Mode                LastWriteTime         Length Name
----                -------------         ------ ----
-a----        8/27/2019   6:57 PM            703 iisstart.htm
-a----        8/27/2019   6:57 PM          99710 iisstart.png

# verify accesses : [iisstart.htm] responds
PS C:\Users\Administrator> Invoke-WebRequest localhost

StatusCode        : 200
StatusDescription : OK
Content           : <!DOCTYPE html PUBLIC "-//W3C//DTD XHTML 1.0 Strict//EN"
.....
.....
ParsedHtml        : System.__ComObject
RawContentLength  : 703

# confirm default documents
PS C:\Users\Administrator> Get-WebConfigurationProperty -Filter "//defaultDocument/files/add" -PSPath "IIS:\Sites\Default Web Site" -Name "value" | select value

Value
-----
Default.htm
Default.asp
index.htm
index.html
iisstart.htm

# create a test page under the Document Root and verify working
# [Write-Output] generates with UTF-16, so specify encoding explicitly with [Out-File]
PS C:\Users\Administrator> Write-Output "IIS Default Start Page" | Out-File C:\inetpub\wwwroot\Default.htm -Encoding Default

# verify accesses
# for [curl.exe], specify extension ⇒ if not specify extension, [curl] is an Alias from [Invoke-WebRequest]
PS C:\Users\Administrator> curl.exe localhost
IIS Default Start Page
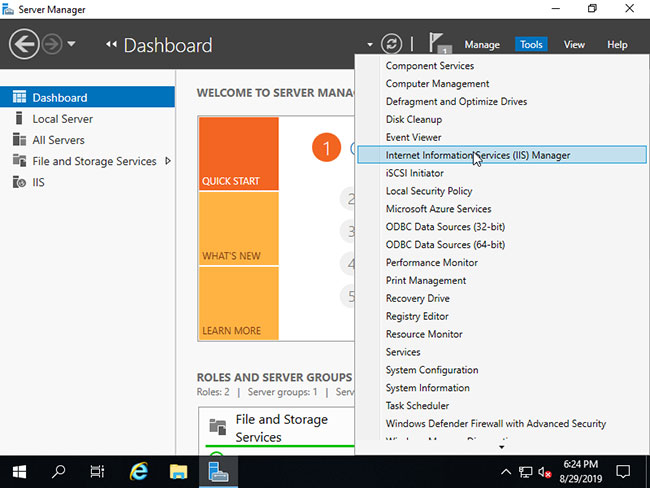
2. Chạy Start > Server Manager và nhấp vào Tools > Internet Information Services (IIS) Manager.
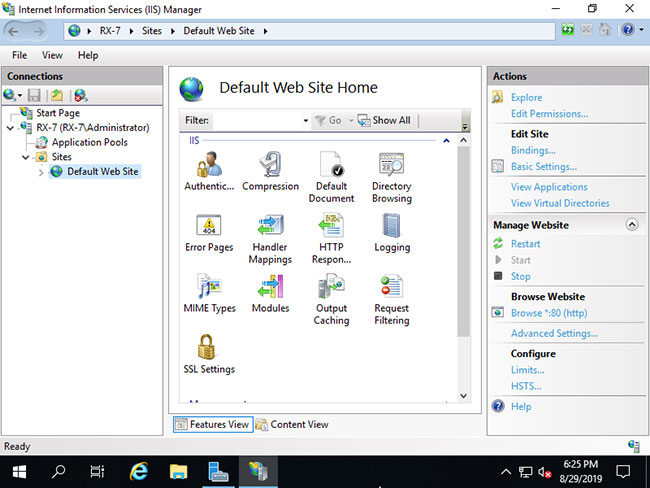
3. Mở các mục ở bảng điều khiển bên trái, Default Web Site được cấu hình.
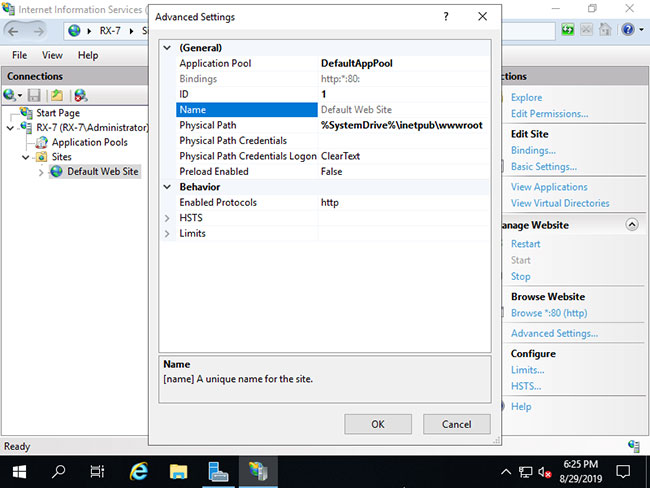
4. Chọn Default Web Site và nhấp vào Advanced Settings..., sau đó có thể xác nhận các cài đặt như Physical Path (Document Root), v.v...
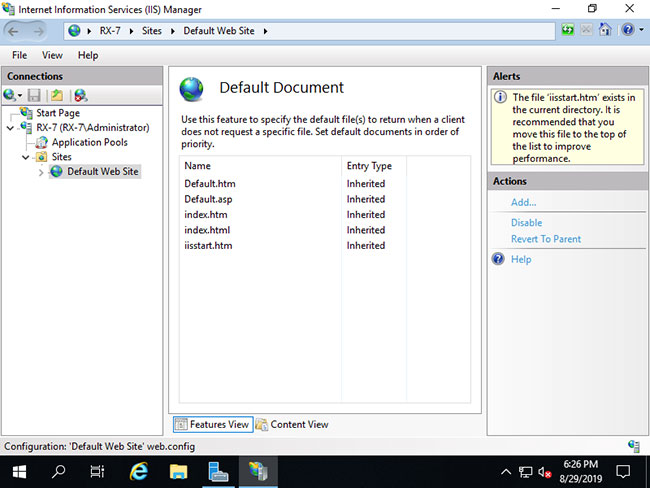
5. Mở Default Document, sau đó có thể xác nhận các tài liệu mặc định.
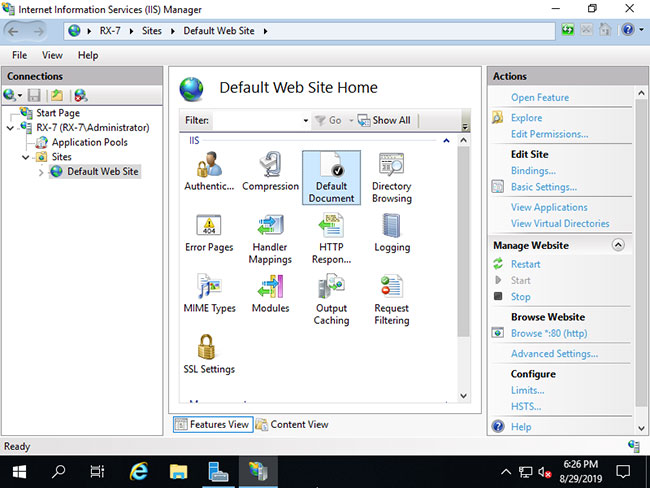
6. Bạn có thể xem các tài liệu mặc định.
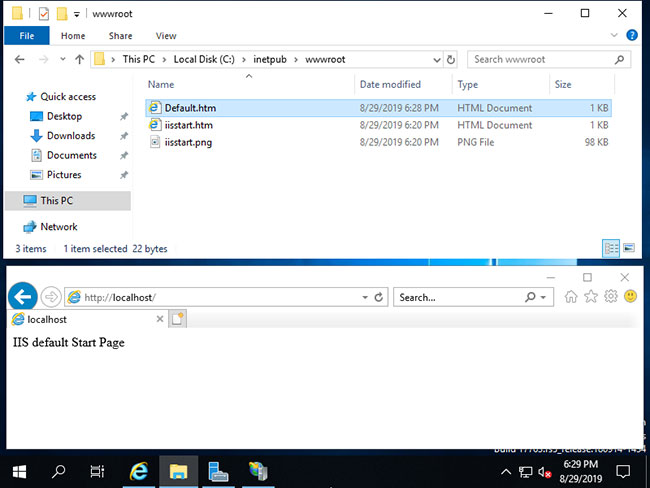
7. Tạo trang test trong Physical Path (Document Root) và xác minh quyền truy cập bằng trình duyệt web.
Với dịch vụ sửa máy tính tại nhà ở Hóc Môn và dịch vụ sửa máy tính tại nhà ở TP.HCM, Công ty Phát Thành Đạt sẽ luôn đem lại sự hài lòng nhất tới cho bạn, dịch vụ sửa chữa máy tính tại nhà luôn đồng hành cùng bạn từ (8h tới 17h trong ngày). Bảo trì định kỳ mỗi tháng (vệ sinh máy tính, update virus, tối ưu hệ thống...). Liên hệ Hotline 0908.554.558 - Info@phatthanhdat.com
Chúc bạn thực hiện thành công!
Xem thêm
1. Tải và cài đặt Windows Server 2019
2. Cách cài đặt VPN trên Windows Server 2019
3. Cách thiết lập ban đầu Windows Server 2019
Những tin mới hơn
Những tin cũ hơn
| Bộ phận: Phòng Chăm sóc khách hàng | |
| Điện thoại | 0908 554 558 |
| info@phatthanhdat.com | |
| skype | luuhongphuc |
| viber | 0908554558 |
| Zalo | 0908554558 |
Phatthanhdat.com - cung cấp dich vụ cài đặt máy tính tận nơi an toàn, nhanh chống và tiện lợi. Khi các bạn gọi chúng tôi sẽ cho chuyên viên IT có tay nghề đến trực tiếp chổ các bạn để tiến hành cài đặt và bảo trì máy tính. Dich vụ cài đặt máy tính tận...
Phòng Chăm sóc khách hàng
Phòng Kỹ thuật
 Tạo nút liên hệ đẹp mà nhẹ không dùng JS cho WordPress
 Active license Windows server 2019 mọi phiên bản không sử dụng file crack – không virus – thành công 100%
 100 WEBSITE ĐẶT BACKLINK MIỄN PHÍ CHẤT LƯỢNG
 Office 2021 Full Crack, 5 cách active chuẩn thành công 1000%
 Hướng dẫn crack Camtasia Studio 9.x thành công 100%
 Active license Windows server 2016 mọi phiên bản không sử dụng file crack – không virus – active 100% thành công
 Download Office 2021 Full Crack
 Phân quyền user domain Window có Full quyền
 Tải ISO Windows 10 22H2 19045 4651 07/2024 Gốc Microsoft
 Phần mềm CorelDRAW X7【Full Key 100%】32bit/64bit Google Drive